
At Zhonghaihang Shipping Supply, we know how vital it is to protect your marine assets. Pneumatic fenders, or Yokohama fenders, are key in absorbing ship impacts during docking. This prevents damage to ships and port structures. Installing these fenders correctly is key to their effectiveness and longevity.
As a trusted marine protection solution provider, we offer a wide range of marine gear. This includes pneumatic fenders for shipyards and harbor owners. Our guide will cover everything from pneumatic fender basics to maintenance. This ensures they work at their best.
Understanding Pneumatic Fenders
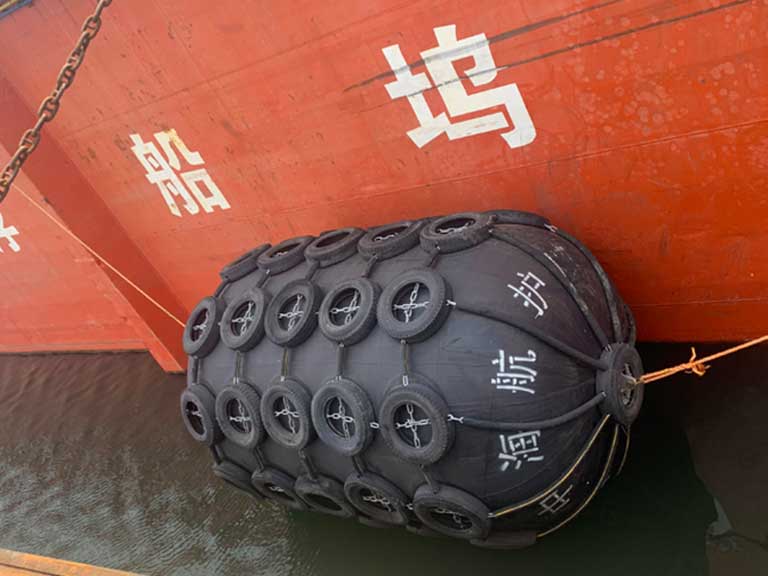
Pneumatic fenders, also known as Yokohama fenders or inflatable rubber fenders. They serve as buffers during ship-to-ship (STS) or ship-to-quay (STQ) berthing operations, absorbing kinetic energy.
They consist of a cylindrical rubber body with hemispherical ends, an internal air chamber. In addition, people often reinforced with tire-cord layers for durability. When inflated, they act as elastic airbags, dispersing impact forces to prevent damage to vessels and infrastructure.
Types of Pneumatic Fenders
There are two primary types, as defined by ISO 17357:
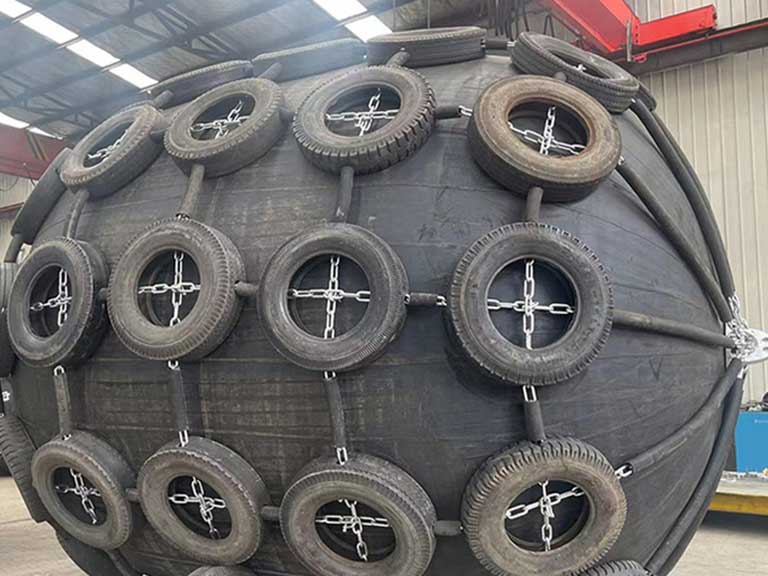
- Type I (Chain-Tire-Net or CTN): Wrapped in chains and tires for added protection against abrasion. Ideal for harsh environments like offshore STS transfers.
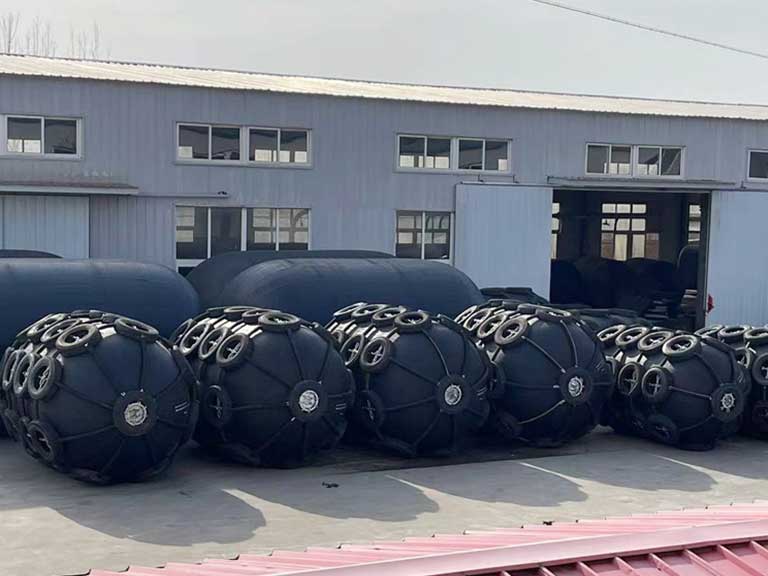
- Type II (Sling Type): Lighter and more flexible, secured via slings or ropes. Suited for calmer ports or temporary setups.
Selection depends on factors like berthing frequency, environmental conditions, and vessel size. For example, CTN types are recommended for high-abrasion scenarios.
Benefits of Proper Installation
Correct installation maximizes energy absorption, extends fender lifespan (typically 10-15 years with maintenance), and enhances safety. Poor setup can lead to premature failure, increasing repair costs by up to 30% according to industry reports.
Key advantages include:
- Optimal performance under compression. Up to 60% deflection without damage.
- Compliance with international standards for reliability.
- Reduced downtime for marine operations.
Preparation Before Installation
Good preparation is key to a successful pneumatic fender installation. We know that installing these fenders needs careful planning and the right tools for a safe and effective process.
Necessary Tools and Equipment
To start, gather all needed tools and equipment:
- Air compressor: Capable of 50-80 kPa output, depending on fender type.
- Calibrated pressure gauge: Accuracy ±1 kPa.
- Securing materials: Chains, ropes, or steel cables (galvanized for corrosion resistance).
- Lifting equipment: Cranes or slings rated for fender weight (e.g., a 3.3m x 6.5m fender weighs ~1,500 kg).
- Leak detection kit: Soap solution for bubble tests.
- Wrenches, screwdrivers, and torque tools for fittings.
Safety Equipment Requirements
Prioritize personal protective equipment (PPE):
- Helmets, gloves, safety shoes, life jackets (mandatory near water), and goggles.
- Pressure relief valves on fenders ≥2.5m diameter, as per ISO 17357.
Warning: Over-inflation risks bursts—never exceed recommended pressures.
Site Inspection and Preparation
Before installing the pneumatic fender, ensure the installation site is ready. Clean the area, mark the zone, check the equipment, assess the weather, and arrange the team. A detailed site check helps spot issues and ensures a clean, sturdy surface.
- Clean the area to prevent any debris from interfering with the installation.
- Mark the installation area to secure it and prevent unauthorized access.
By following these steps and having all the necessary materials and tools, we ensure a successful pneumatic fender installation. This meets the needs of our marine clients.
Step-by-Step Guide to Install Pneumatic Fenders
To get the most out of pneumatic fenders, you need a clear installation guide. This ensures they work well and last long. They are key to protecting ships and docks.
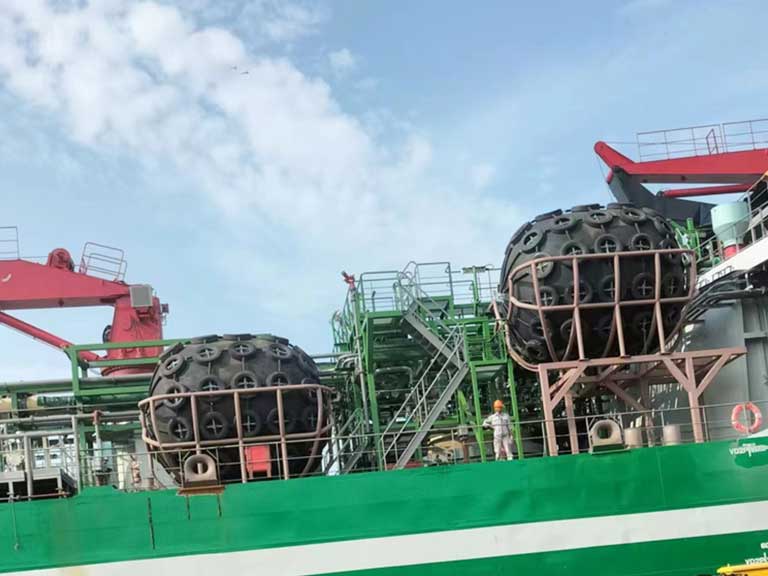
Positioning the Fender
- Calculate ideal height. Position the fender so contacts the vessel’s hull at mid-height during low tide.
- Use dock blueprints or laser levels for alignment. Ensure even spacing (e.g., 1-2x fender diameter apart).
- For STS, suspend via guy chains at 45-60°

Securing Methods
Securing the fender is a big step. You need to pick the right method based on the fender size and where it will be used. Chains, ropes, or steel cables are good choices.
- Chain Securing Technique: Using chains gives the fender stability, especially for big ones. It’s best for busy docks where ships hit the fenders a lot. Make sure the chains are tight to keep the fender in place.
- Rope and Steel Cable Options: For more flexible setups, ropes and steel cables work well. They let the fender move a bit, which is good for some docking situations. But make sure they are securely attached and the right tension is maintained.
Proper Inflation Techniques
- Remove the valve cap and core. Connect the air hose with closed ball valves.
- Inflate gradually to 50 kPa (low-pressure) or 80 kPa (high-pressure) initial rating, per ISO 17357.
- Monitor with a gauge. And perform a leak test using a soap solution.
- For large fenders, use a compressor ≥5 HP. Please avoid over-inflation (max +10% of rating).
Final Inspection After Installation
After setting up the fender, check it carefully. Make sure everything is installed right, accessories are safe, and the pressure and alignment are correct. Taking photos and notes is a good idea for future checks.
- Verify pressure, alignment, and secure fittings.
- Test deflection under simulated load.
- Document with photos, pressure logs, and serial numbers for traceability.
Common Installation Errors and Troubleshooting
Installing pneumatic fenders wrong can hurt their performance and safety. It’s important to spot and fix these mistakes. Even with careful planning, things can go wrong.
Positioning Errors
Getting the fender’s position wrong is a common problem. If it’s not right, it won’t work well and could damage ships or docks. To avoid this, align it carefully with the contact area. Always check the site before installing to find the best spot.
Inflation Problems
Getting the fender’s air pressure just right is key. Too little or too much can cause problems. To fix issues, check and keep the pressure as the maker says.
Inadequate Securing Issues
If the fender isn’t secured well, it can move and cause damage. Use the right securing methods, like chains or ropes. Also, make sure the surface is clean and free of oil to keep the fender in place. Regular checks can catch and fix any issues early.
| Error | Cause | Solution | Prevention |
|---|---|---|---|
| Misalignment | Inaccurate marking | Reposition using levels; recheck against vessel drafts. | Use ISO-compliant sizing charts. |
| Over/Under-Inflation | Faulty gauge or haste | Deflate/inflate to 50-80 kPa; calibrate tools annually. | Install relief valves; train on procedures. |
| Loose Securing | Insufficient tension | Retighten chains/ropes; replace worn parts. | Quarterly inspections; use torque wrenches. |
| Leaks | Valve damage | Apply sealant or replace; test with bubbles. | Handle carefully during storage. |

Maintenance and Care of Installed Pneumatic Fenders
Pneumatic fenders need regular care to work well in harsh marine environments. Keeping them in good shape is key to their long life and performance.
- Inspection Schedule: Check pressure monthly; full visual/tactile inspections every 3-6 months, or after storms. Look for cuts, abrasions, or pressure drops (>10%).
- Cleaning: Rinse with fresh water and mild soap weekly in salty environments. Use soft brushes and avoid abrasives or chemicals.
- Storage: Deflate to 20-30 kPa if unused. Store in shaded, ventilated areas away from ozone sources.
- Repairs: Patch minor damage per the manufacturer’s kits. Replace if deflection efficiency drops below 80%.
By following these steps and using the right tools, your pneumatic fenders will last longer. They will keep your marine area safe and protected.
FAQ
What is the recommended maintenance schedule for rubber fenders?
How do I determine the correct size of pneumatic fender for my vessel?
What are the most common mistakes to avoid during fender installation?
Can pneumatic fenders be used in extreme weather conditions?
How do I properly clean and inspect my pneumatic fender?
What type of air compressor is required for inflating pneumatic fenders?
Talk to our team.
Share a few details about your project — vessel, port, or operation. We'll reply within 24 hours.